Four Pillars of a Successful Development Project

Or, How I Learned to Stop Worrying and Love a Detailed Meeting Outline

As a technical project manager turned full stack JavaScript developer, I have a unique understanding of the complexities of a development project and the many and varied ways one can succeed or fail. Different PMs apply different management methods to different projects based on their experience and the needs of the client. Some projects are handled the old fashioned way, following a strict waterfall schedule with deliverable deadlines and features set from the start. Others are more agile, with features being regularly re-prioritized based on user feedback and the clients’ changing needs. I’ve seen projects succeed and fail under a variety of management methods and processes for many different reasons. That’s all well and good. HOWEVER…

This post isn’t about all that.

In this post, I want to go a little deeper than method or process. I’d like to talk about philosophy. Specifically, the philosophy that transcends method and applies to all your projects, regardless of who’s involved or how they’re run.

Over the course of my 10+ years in this industry I’ve developed a set of pretty straightforward principles that I use to guide a technical project. These are my “pillars of success”, so to speak, and I strive to apply them in every project I take on. They’ve helped me manage projects big and small, as part of a team or as a sole freelancer. They’ve also helped me when I wasn’t in a management position and was simply a part of a larger whole. I hope you find them helpful!


1. Preparation

My first and most import project pillar is preparation. (Second is alliteration, apparently.). When I’m beginning a project I try to front-load it with as many planning meetings as I can, from SOW planning with biz dev, to the general project kick-off with the client, to the technical kick-off with developers, dev-ops, and QA. These meetings may sometimes seem like overkill, but they are necessary for laying the foundation for understanding project milestones and setting the team up to for success.

By answering questions and working out as many details at the beginning of a project as possible, we avoid coding blindly and having to backtrack and rework components or features. Planning and documenting upfront also helps us set client expectations appropriately and more easily handoff tasks and project assets between team members.


2. Transparency*

I strive for radical transparency on all my projects. This means being proactively communicative and keeping appropriate stakeholders apprised of one’s progress at all times.

Transparency is a tricky idea to throw around because it can mean different things to different people. For me, transparency comes in many forms: being vocal on Slack or over email about when you will be working and when you’re unavailable; writing clear sprint or kanban tickets and keeping them in the appropriate progress columns; coming to and fully participating in meetings and stand-ups; letting PMs and other team members know when you’re blocked on a task; asking for help when you’re stuck; and much more.

The above are all good examples of transparency; however, they can still leave room for misunderstanding. That’s where the radical part comes in. Radical transparency happens when you pair good communication with relevant and necessary context. For instance, when giving an update in a stand-up, we talk about what we just finished working on, what we’re currently working on, and what we plan on working on next. This format keeps stand-ups relatively short, but still gives everyone a good idea of who’s doing what so there’s no cross-work.

Another example is writing clear reproduction steps and attaching screenshots when writing bug reports. Sometimes a bug or error that seems obvious to you will be meaningless to the person to whom it’s assigned. Repro steps, device/environment info, and screenshots help contextualize the bug in a way that lets anyone read the issue and understand it without having to come back to you with more questions.

*Everything in the transparency section is meant to be applied internally. While I also believe in radical transparency with the client, it’s still possible to overshare and needlessly worry them, and that’s a whole other blog post.


3. Modularity

My third pillar of project success is modularity. Well-contextualized design systems and component diagrams help developers break down work into the smallest possible chunks, making iteration easier and rework less likely.

Building out an app modularly also help PMs and producers explain the scope of a feature to the client by offering all the different moving parts involved in that feature. For instance, a client might view a request for a login form as a relatively simple ask. It’s just an HTML form, right? How hard could it be? What component breakdowns help you do is show what’s actually involved in that request, from user authentication (is this a third-party API call?), to data storage (where is the user info being held?), to higher-order functions (how will you restrict certain page access to users that aren’t logged in?). Discussing these components and asking these questions help the client understand everything that goes into “just adding a form”.

For site and app redesign projects, rolling out changes modularly helps reduce the amount of acquired knowledge users must gain (or re-gain!) in order to continue to use the system they know and love. In other words, modular roll-outs means a user isn’t presented with an entirely different UX or design the next time they update your app.

Finally, having clear and up-to-date design systems and component diagrams in place makes on-boarding new devs a lot easier. ‘Nuff said!


4. Ownership

Finally, I encourage all stakeholders (including the client!) to take ownership of their part of the development project. This means educating yourself on something that you’re not familiar with if it’s an integral part of the project. It means taking notes during meetings and speaking up if your notes don’t match what’s being discussed in a stand-up or future meeting. It means wireframing full pages and individual UI components, even if you’re not a designer, so that team members have an idea of what you’re building. It means writing and updating component diagrams and READMEs.

Most importantly, ownership means creating a deliverable that is useful, decipherable, and has obvious intent, no matter how small the scope. Current or future team members should be able to review your deliverable and, without any input from you, understand why you made it and how it can help them.


Of course, these are just a few of my favorite pillars of a successful development project. There are many others that are equally indispensable. What are some of the principles that you stick to in a project? Leave a comment and tell me all about ’em!

Thanks for reading, and until next time, here codes nothing!

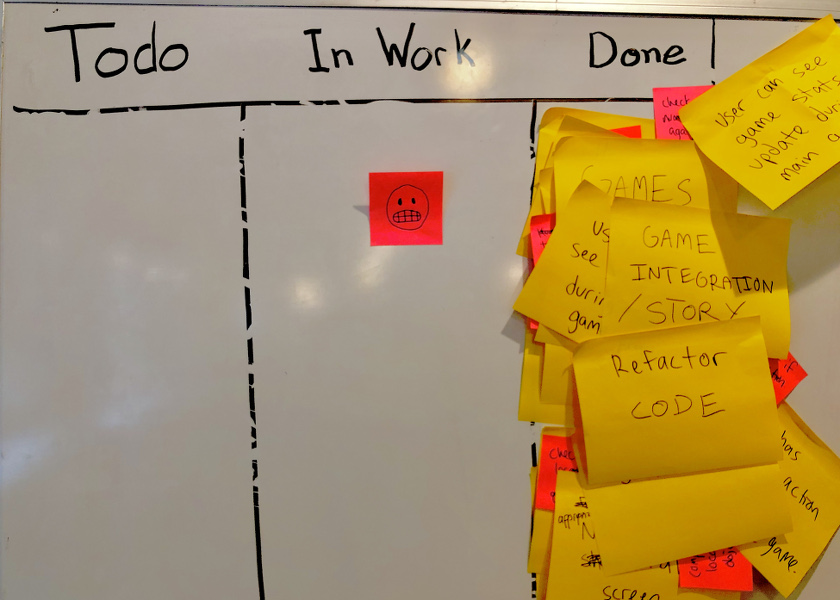
Feature Photo by NESA by Makers on Unsplash

Introducing Mega Nap!

For the love of apps!

Yes this is a post about an amazing web application I helped create but first…

I finished coding school!

I graduated on June 26 with a Certificate of Training in FullStack JavaScript from Alchemy Code Lab in beautiful downtown Portland, Oregon. The program kicked my ass and there were a few moments when I wasn’t sure I was going to make it, but I worked really hard and came out of the program confident, capable, and full of great ideas and the programming chops to make them a reality. A huge thank you to Ryan for being a great instructor, Paige, Ryan, Easton, and Mack for being great TAs, Shannon for teaching us how to prepare for our job searches, and Marty and Megan for running such a great program.

What a fine looking group of alums!

Okay, on to the fun stuff!

I’m thrilled to present Mega Nap, the easiest way to make a full stack application without having to write a lick of backend code.

Mega Nap was my final project at Alchemy and was created by myself and four other students: Emily Baier (@hellotaco), Chris Piccaro (@picassospaint), Marty Martinez (@TDDandDragons), and Tommy Tran (@TranTTommy). We built it in just six days using an agile development process involving user stories, story point estimation, mini-sprints, and daily retrospectives. It was an incredibly balanced team and we worked really well together.

What Is Mega Nap?

Mega Nap is a web application that allows frontend developers to create a database, design database models, populate their new database, and receive RESTful API endpoints they can ping to access their data. All of this is done via a few simple web forms, so they can quickly and easily create and use API endpoints without having to write any backend code.

The inspiration for this project came from working almost exclusively with the Pokemon API while learning to fetch from third party data sources in React/Redux applications. Now don’t get me wrong, that API is legit. However, using the same data over in over our apps was getting boring, so we decided to create a tool frontend developers or those new to programming could use to make their own APIs. We brainstormed features, divvied up the work, and Mega Nap was born!


The Client

The Mega Nap client is build with React/Redux and deployed to Netlify. We used Auth0 for user account creation and authentication and styled components in lieu of plain CSS for most of the styling. We ran unit and snapshot tests in Jest and used Redux promise middleware for handling promises in our API fetch services.

One particularly tricky part of the front end was the data entry form the user fills out after creating their database models. We needed a form with fields that were dynamically generated based on the name and type the user had just set as the key/value pairs in their database model. To accomplish this we had to create an array of fields by running Object.entries on the parsed model schema JSON object we got from our server after the model was created. We then passed this to our form component, which mapped through that array and created a list of fields by running each array item value through a switch and returning the correct JSX form label and input based on the field type. We then rendered the list of returned labels/inputs, allowing the user to immediately enter their data!


An example of a dynamically-generated data upload form based on a “Dog” model.

The Server

The Mega Nap server is built with Node.js and Express, is deployed to Heroku, and uses MongoDB for data storage. We used the jwks-rsa auth0 npm package to create middleware that ensures authentication and only needed to create two database models: the Database, which is used to create a new database for each of the user’s models, and the Model, which has a schema value that holds all the user’s inputted model values. We used Cloudinary for uploading and storing images, so our users can upload images and receive image URIs back in their API calls and we don’t have to waste precious database space on storing their images.

We create each new model schema by using the reviver function, which takes the key/value pairs entered by our user as field names and input types, and then runs them through a switch and is passed as the second argument in creating a new Schema using Mongoose. We intentionally restricted the data types the user could use in their models to strings, numbers, and booleans, in order to keep our database super flat and not have to worry about models referencing or being dependent on other models. This allowed us to maintain a very flat, two-level database structure, with each user model being it’s own collection and all data being added as single documents in their appropriate model collections.

Each user’s model gets their own collection in our MongoDB database.
The data uploaded for each model is stored as an individual document in its appropriate collection.

The Look and Feel

We knew from the beginning that we wanted the user experience to be as painless and fun as possible. To achieve this we chose a modern, earthy-yet-energetic color scheme, using the Color Marketing Group’s prediction for 2020 Color of the Year, Neo Mint, as our primary color and combining it with cooler neutrals and one pop of vibrant pink for contrast.

I designed the homepage based on wirefames we worked on together and using modified iconography found on FlatIcon.com, trying to create an aesthetic that spoke to the fun, simple experience we wanted the user to have on our site. Emily and I styled the site together, with me handling most of the static or global components and her working on form styling and transitions. This was the first time either of us had really used styled components, so we not only had to figure out our styling in just a few days, we also had to learn a new styling language to do it.

An earlier version of the logo and word mark. We liked it, but it was too difficult to incorporate into a web design.

Next Steps

We’re all really proud of this project and are planning on making improvements to it as our individual schedules allow. My contribution to the future of the site is to make a mobile version of it using React Native. I’ve played around a bit with React Native and am excited to dive deeper into the documentation and begin building our mobile version soon.


Thanks so much for reading about our humble little web app! I’m really proud of what we were able to accomplish in under a single work week and hope you have fun creating API endpoints using it.


Until next time friends, here codes nothing!

Learn By Doing: Pagination in Vanilla JavaScript

Welcome to Learn By Doing, a series of posts in which I attempt to explain basic coding functions by working them out in simple exercises. This week: pagination using only vanilla JavaScript!

This exercise assumes a few things:

  1. Your data set is in an array of which you know the length (e.g., you pinged an API and got back a results array containing 100 objects)
  2. You know how many results you want to show per page.
  3. You have pagination HTML elements already coded that include the following:
    1. Previous Button
    2. Current Page Number
    3. Total Page Number
    4. Next Button

For this example we’ll work with an array of a hundred items and show 10 items per page.

The first thing we want to do is identify the different components that will work together to allow us to paginate our array. They are:

  1. A pagination component that contains a function to update the pagination UI when buttons are clicked.
  2. A list component that renders the updated pagination UI when the pagination component function is called.
  3. Finally, a page array component that splits the results into the appropriate slices based on the current page value.

The first step is to start filling out our paging component. Create a paging-component.js file and begin setting up the variables we’ll need.

const previousButton = document.getElementById('previous');
const nextButton = document.getElementById('next');
const currentPage = document.getElementById('current-page');
const totalPages = document.getElementById('total-pages');
const PER_PAGE = 10;

let currentPageNumber = 1;
previousButton.disabled = currentPageNumber === 1;
currentPage.textContent = currentPageNumber;

Here we’re accessing the DOM nodes for the UI elements we already have coded (Previous Button, Next Button, Current Page, and Total Pages), setting a PER_PAGE const of 10 to restrict the number of items we’ll show at a time, initializing a currentPageNumber let of 1, disabling the previousButton if the currentPageNumber is 1, and setting the text of the currentPage node to the currentPageNumber.

Next, we want to export our component’s main function, loadPaging(). loadPaging will take an argument we can call totalItems.

export default function loadPaging(totalItems) {
   const totalPageCount = Math.ceil(totalItems / PER_PAGE);
   totalPages.textContent = totalPageCount;
}

Here we’re taking the total number of items in the array and creating a totalPageCount variable by dividing the totalItems by our set PER_PAGE number. We can then set this number to be the text content of our totalPages DOM node.

Next we want to add some event listeners to our little button friends so the function knows to do something when they are clicked.

nextButton.addEventListener('click', () => {
currentPageNumber++;
}

previousButton.addEventListener('click', () => {
currentPageNumber--;
}

This is a pretty straightforward increment/decrement functionality. If the nextButton is clicked the currentPageNumber goes up one. If the previousButton is clicked, the currentPageNumber goes down one.

But this doesn’t do much to our UI yet since we don’t yet have a function that updates our pagination UI when the currentPageNumber variables change. Let’s make that now.

function updatePaging() {
   currentPage.textContent = currentPageNumber;
   const pagingOptions = {
        currentPageNumber: currentPageNumber,
        perPage: PER_PAGE
   };
   callback(pagingOptions);
   nextButton.disabled = currentPageNumber === totalPageCount;
   previousButton.disabled = currentPageNumber === 1;
} 

So, what’s going on here? Well, the first thing we’re doing is updating the text content of our currentPage node with the currentPageNumber. Next, we’re creating an object with the currentPageNumber and perPage properties that we’ll use in the future as a callback argument. Finally, we need some logic to disable the previousButton and nextButton if the currentPageNumber is 1 or the totalPageCount. This ensures that the page UI won’t go on to infinity when the nextButton is pressed nor start getting into negative numbers when the previousButton is pressed.

The final thing to do with this loadPaging function is to pass it the callback that we will use in the future and call the newly-created updatePaging function where we want the page UI to update.

The final code will look like this:

const previousButton = document.getElementById('previous');
const nextButton = document.getElementById('next');
const currentPage = document.getElementById('current-page');
const totalPages = document.getElementById('total-pages');
const PER_PAGE = 10;

let currentPageNumber = 1;
previousButton.disabled = currentPageNumber === 1;
currentPage.textContent = currentPageNumber;

export default function loadPaging(totalItems, callback) {
   const totalPageCount = Math.ceil(totalItems / PER_PAGE);
   totalPages.textContent = totalPageCount;

   function updatePaging() {
      currentPage.textContent = currentPageNumber;
      const pagingOptions = {
           currentPageNumber: currentPageNumber,
           perPage: PER_PAGE
      };
      callback(pagingOptions);
      nextButton.disabled = currentPageNumber === totalPageCount;
      previousButton.disabled = currentPageNumber === 1;
   } 

   updatePaging();

   nextButton.addEventListener('click', () => {
      currentPageNumber++;
      updatePaging();
   });

   previousButton.addEventListener('click', () => {
      currentPageNumber--;
      updatePaging();
   });
}

Nice job! We now have a pretty cool little pagination component that loads pages and updates them when buttons are pressed. But how do we display the pages? Why, that’s a job for our list component!

To start, create a list-component.js file and write a function that creates a template string of a list item.

function createLi(item) {
   const template = document.createElement('template');
   const html = `
   <li>
      <h2>${item.title}</h2>
      <img src="${item.img_url}" >
      <p>${item.description}</p>
   </li>`; 

   template.innerHTML = html;

   return template.content;
}

NOTE: The above code uses interpolation to populate the html template string with content from the list item object. The properties in your array objects will probably be different or differently named, so make sure to change up the property keys you’re referencing accordingly.

Next, we need to create and export our main function that will create the list and append it to the correct DOM element.

const list = document.getElementById('list');

export default function loadList(items) {
while(items.children.length > 0) {
items.lastElementChild.remove();
}
items.forEach(item => {
const itemLi = createLi(item);
list.appendChild(itemLi);
});
}

Here we’re grabbing the list node from the DOM, mapping through our array of items, creating a new list item for each item in the array by calling our createLi function, and appending that list item to the list node. The while loop removes the items on the page before adding the new list items to the node, which stops our paging from just having list items added on top of each other over and over again.

The final script should look something like this:

function createLi(item) {
   const template = document.createElement('template');
   const html = `
   <li>
      <h2>${item.title}</h2>
      <img src="${item.img_url} >
      <p>${item.description}</p>
   </li>`; 

   template.innerHTML = html;

   return template.content;
}

const list = document.getElementById('list');

export default function loadList(items) {
   while(items.children.length > 0) {
      items.lastElementChild.remove();
   }
   items.forEach(item => {
      const itemLi = createLi(item);
      list.appendChild(itemLi);
   });
}

Only a couple more things to do before we can see our little pagination friend in action!

The next step is creating a function that splits our items array based on the currentPage variable. Remember when we made that mysterious callback and pagingOptions object in loadPaging? Well now is its time to shine!

Start by writing and exporting a default function that takes our array of items and the pagingOptions we want to use in the callback.

export default function pageArraySplit(array, pagingOptions) {
   //splitting code to go here
}

Next, we want to set our currentPageNumber and perPage variables to the values in the pagingOptions object we passed into the function

const currentPageNumber = pagingOptions.currentPageNumber;
const perPage = pagingOptions.perPage;

Next, we will define a starting index and an ending index so the function knows where to slice the array.

const startingIndex = (currentPageNumber - 1) * perPage;
const endingIndex = startingIndex + perPage;

Finally, we want to return a sliced array using the startingIndex and endingIndex variables as the slice index arguments.

return array.slice(startingIndex, endingIndex);

The final function should look like this:

export default function pageArraySplit(array, pagingOptions) {
   const currentPageNumber = pagingOptions.currentPageNumber;
   const perPage = pagingOptions.perPage;
   const startingIndex = (currentPageNumber - 1) * perPage;
   const endingIndex = startingIndex + perPage;

   return array.slice(startingIndex, endingIndex);
}

Ooooh, we’re so close I can taste it! The last thing we need to do is update our index.js script to load the page and slice though the items array when the buttons are pushed.

First, let’s import the right components.

import itemsArray from '../data/items.js' //your data source will vary
import loadList from './list-component.js';
import loadPaging from './paging-component.js';
import pageArraySplit from './page-array.js';

NOTE: Your itemsArray will be whatever data source you are trying to page through. If you’re getting results from an API fetch, that variable should be the results body you’ve accessed from the returned JSON object.

Finally, all we need to do is call the loadPaging function, pass it the length of the array we’re paging through and our pagingOptions, create a new items array from the pageArraySplit function, and load the list using that new array.

loadPaging(itemsArray.length, pagingOptions => {
const newArray = pageArraySplit(itemsArray, pagingOptions);
loadList(newArray);
}

Call this script on your index.html, feed it a data source, throw on some styles, and you’ve got some pretty sweet pagination going on! Here’s an example of this code on a quick and dirty Pokemon Pokedex I created:

As always, if you find a bug or have a suggestion for how to improve this code, please leave a comment and I’ll update the post.

Until next time friends, here codes nothing!

Feature Photo by Patrick Tomasso on Unsplash

Say Hello to Robot Haikubot!

The best automated Twitter account on the planet.

Last week my project team made something I’m particularly proud of: Robot Haikubot! 

Robot Haikubot combined our interests in poetry, data aggregation, sentiment analysis, automation, and social interaction into a Twitter bot that was fun to make and is even more fun to use.

I am a robot
Created by students at
Alchemy Code Lab

What It Does

Robot Haikubot will tweet you a randomly-generated haiku when you tweet at it; e.g., “Hey @RobotHaikubot, you up?”

You can also include either a #positive#negative, or #neutral hashtag in your tweet and get back a haiku with that sentiment; e.g., “Hey @RobotHaikubot, I would love a #positive haiku please!”.

Finally, you can add to our database of five-syllable and seven-syllable lines by adding the hashtag #five or #seven to your line; e.g., “@RobotHaikubot #five Get me a glass, please”. And don’t worry about adding erroneous lines to the db. Robot Haikubot uses syllable counting to validate if a line being added has five or seven syllables. If it doesn’t, the line won’t be added — no harm, no foul!


How It’s Built

Robot Haikubot is built using Node.js, MongoDB, and Express for data management and manipulation and the Twit, Sentiment, and Syllable npm packages for accessing the Twitter API and checking syllable count and sentiment. We deployed the final app to Heroku.

For syllable counting, we wrote a function using the Syllable npm package and imported that into a syllable-count middleware that validates the syllables in a line and sends the request to the correct route if valid or an error message if not.

For sentiment, we wrote a function using the Sentiment npm package that maps through a valid five or seven line and assigns a composite sentiment score to the instance of that line model before storing it in the database. This allowed us to take sentiment-specific get requests from the user when asking for a haiku.

Finally, the Twit npm package allowed us to open a stream from our bot account and listen for tweet events that mention our bot’s name and then tweet a haiku to the user making that request.

(Fun fact: don’t tweet your bot’s name from the account you have programmed to listen for that name and reply to unless you want an infinite loop of your bot listening for and tweeting to itself!)

Make Requests via Postman

Want to interact with Robot Haikubot but don’t have a Twitter account? You can make requests directly to the API via Postman by getting from and posting to these routes:


Contribute to Robot Haikubot!

My team did a ton of work to get Robot Haikubot up and running last week but there are still a handful of stretch goals we didn’t get to that we’d love some help with! If you’re comfortable with Node, MongoDB, Express, Mongoose, or just want to play around with our code, grab one of the open tickets here and have a go! For testing, you will need to include a .env file in your root and populate it with your version of the following keys:

 //credentials for accessing and authenticating mongodb
 MONGODB_URI=your-key-here
 AUTH_SECRET=your-key-here 

 //twitter credentials//
 CONSUMER_KEY='your-key-here'
 CONSUMER_SECRET='your-key-here'
 ACCESS_TOKEN='your-key-here'
 ACCESS_TOKEN_SECRET='your-key-here'
 TWITTER_SECRET='your-key-here'
 
 //base url for routes/twit API//
 BASE_URL=http://localhost:your-preferred-port
 
 //admin credentials for authenticating fives and sevens//
 ADMIN_LOGIN='your-key-here' 

Finally, don’t forget to follow my brilliant project partners on Twitter:


Thank you for reading.
Now, log on to Twitter and
have fun with our bot!

Let’s Catch-Up!

Absence makes the blog grow fonder.

Well hello there stranger! It’s been a minute, hasn’t it? Apologies for not posting anything the past SIX WEEKS (eep!), but Bootcamp II was a rush, then I went to New York for spring break (pics below!), then we started Career Track. I know you’re eager to read all about my progress over the past month-and-a-half, so without any more fuss or delay, here’s…

What I learned the Past Six Weeks: A Brief Recap

  • Week 7: APIs and serverless data storage
    • This week involved learning how to fetch data from third-party APIs, sort, filter, and paginate the results, and use Firebase to authenticate and save users. The main project I made this week was a Candidate Tracker that allows users to up-vote their favorite Democratic 2020 primary candidates during debates. GitHub repo here, deployed site here.
  • Week 8: Final Project Week (see Code In Action, below)
    • My team’s final project for Bootcamp II was a gif-based translation and guessing game using the Giphy API. See below for a more detailed description and a link to the deployed site.
  • Week 9: Spring Break: I went to NYC!
    • This was my first time in New York and I had a blast. I went to the Met, saw Sleep No More, hung out in Central Park, sang karaoke at Stonewall, bookstore-hopped in Brooklyn, and got pizza at 3 AM. Scroll to the bottom for some highlight pics.
  • Week 10: Node Fundamentals: Backend Stuff, Binary, Buffers
    • The first few weeks of Career Track really kicked my ass. This is the first time I’ve worked on the backend and I found it very hard to pick up the concepts. This week we were introduced to Node.js, binary, buffers, bitmaps (the hardest fucking thing I’ve ever tried to learn), destructuring, arrow functions, callbacks and asynchronous code, creating a local database, using Jest to test in the terminal, and installing project dependencies. It was a lot to come back to after a week in New York.
  • Week 11: Server Fundamentals Using Node
    • The second week of Career Track was as hard as the first, if not more so. This week we got into creating our first Node servers, learned about promises, (attempted) to make a chat app, started pinging APIs from the backend, started working with Express, learned about middleware, learned about Big O, and had to write our own functions that performed the same actions as .pop() and .push() without using any existing array or string methods, only loops and indexes. Oy.
  • Week 12: Express and MongoDB
    • Last week was a little easier, mostly because we started using Express and Mongoose to help with server creation and middleware. We also were introduced to MongoDB and Postman and deployed our first apps to Heroku! It was a week of bringing vague backend concepts out of the shadows and seeing how they work together in a much more user-focused way.

Code In Action

My final project for Bootcamp II is my favorite thing I’ve made in the course to-date. I really enjoyed my team, we kept on pace for the entire week, we worked through issues calmly when we were starting to get irritated with the project and each other, and we finished in time to add in a couple nice-to-haves to the final product. Check it out:

Talk Giphy to Me
GitHub Repo here | Live Site Here

  • What it is: A web app that uses the Giphy API to allow users to translate a message into a series of gifs, play a hangman-style guessing game based on a random gif, and save their favorite gifs to a page for later viewing.
  • What it demonstrates: Fetching from a third-party API, promises and asynchronous programming, pagination, sorting and filtering of data.
  • My main takeaways: I learned a lot about asynchronous functions, array methods, the order and placement of event listeners, different ways to manipulate the Firebase database, and how not to go about styling a group project (pro-tip: don’t do it as a group!). I also got a lot more comfortable with Flexbox and learned about the CSS ‘Computed’ inspection tool in Chrome. 

Closing Thoughts

I know I mentioned this in the last post, but future posts will stray from the Week-In-Review format. I’ve got two alternate format posts in the cooker already: one on how to deal with burnout, and the other on how to hash a new user’s password using virtuals and hooks in Mongoose. You can barely stand the wait!

Also, earlier I promised some pics from my trip to New York, so here ya go.

Until next week friends, here codes nothing!

Feature Photo by Bewakoof.com Official on Unsplash

Week 5 & 6: Bootcamp II Begins!

Yes of course I’m going to make ‘fetch’ jokes geez.


Okay, I’m gonna be real with y’all for a minute.

These weekly recap posts are starting to get a little tiresome.

“But Ben, we love your weekly recaps! They’re so informative and funny and full of GIFs of handsome mens!”

Look. I hear you. I get it. I’m not saying I’m going to stop writing them, or that I’m not getting some recap goodness out of them myself. I just want to make it clear that I’m getting a teensy bit bored with the format and will be exploring other types of posts in the future (IN ADDITION TO THE RECAPS CALM DOWN). I’ve got a number of good ideas cooking already, including posts about how coding is teaching me to be a better fiction reader, how AI might change what it means to be a developer, and the difference between being able to write code and being able to read it. So if you, like me, are growing tired of this format, have no fear. Hot new topics are heading your way soon. In the meantime, let’s dive in to what I learned the past two weeks!

We kicked Bootcamp II off with a bang, and by bang I mean a head-first dive into asynchronous programming. Here’s what we covered the past two weeks:

  • HTML templates
  • Using .forEach on arrays
  • Named imports and exports
  • Arrow functions
  • Callbacks
  • Sorting, slicing, and paginating data
  • Asynchronous functions and promises
  • (Making) fetch (happen) and accessing/using third party API data

Code in Action

I have two projects to show you this week. They’re both fairly similar, but I’m showing both because I’m proud of the progress I made between building the two. The News Search app, which I built first, was my first solo attempt at fetching and paginating data from an external API, and it took a lot of note-referencing and Googling in order to build it. The NASA GeneLab Search app was my second attempt, and I was able to bang that out in a few hours Friday afternoon. That build was actually the first time I was able to put on music, open up VSCode, and get into a sort of coding-trance that I’d heard developer friends talk about before (thanks Bey!). It was weird and awesome, and I’m proud that I was able to reach that state from my previous project frustration in just a few days.

News Search App
GitHub Repo Here | Live Site Here

  • What it is: A search site that pings NewsAPI.org to get results from over 30,000 news sites and blogs.
  • What it demonstrates: Fetching from a third-party API, promises and asynchronous programming, pagination, sorting and filtering of data.
  • Hardest part: Remembering all steps involved: capturing a user’s search input, creating a hash query to track the search and the page, listening for a change on that hash, using the hashchange to trigger the API fetch, and paginating the results. Oh, and styling of course (OF COURSE!).
  • Easiest part: Accessing and displaying the fetch results. The NewsAPI sends back a pretty reasonable object from a fetch, so it was easy to access the data I needed and place it where I wanted it.

NASA GeneLab Search App
GitHub Repo Here | Live Site Here

  • What it is: Another search app, this one working with NASA’s GeneLab database.
  • What it demonstrates: Same as above: API fetching, manipulating and displaying results data, hashchange events, etc.
  • Hardest part: Unlike the NewsAPI results, the objects NASA was sending back were layered and complex (go fig). This made it difficult to figure out how to correctly name the interpolation placeholders in my template literal sections of my list-building function.
  • Easiest part: Surprisingly, styling was pretty easy this time around. I tried to mimic the NASA GeneLab site itself, which was laid out in a very straightforward way, so I didn’t have to bang my head against the wall trying to figure out how to make it look good. Turns out NASA scientists aren’t too concerned with snazzy CSS effects. Who would’ve thought?

Closing Thoughts

I don’t have any significant insight about struggles or successes to share this week, but I will say that I’m excited to start working with concepts that are more nuanced and complicated and tools that allows me to participate in the larger ecosystem that is this World Wide Web I’ve been hearing so much about. This coming week we’re going to start to work with cloud-based databases and (eep!) backend stuff, so I’m very stoked about what we’ll be building in the next few days.

I’ll leave you tonight with an adorable story from this weekend: I was babysitting my son (sperm-donor daddy here, he has two moms, we’re a Big Gay Family, email me with questions) and he couldn’t stop talking about Pokemon. Well, last week we just so happened to build a Pokedex to practice pagination and sorting data, and when I showed it to him he was mesmerized. I asked him if he’d like me to build it out more so he could use it to look up information about any Pokemon and he said, “Yes! And of course you want to start with Pikachu. But after that I think it’ll probably take three… no, four… no, five weeks to add all the other Pokemon. So I’ll look forward to it in five weeks!”.

Honestly one of the most reasonable client requests I’ve heard.

He was shocked that my MacBook wasn’t a touchscreen.

It was a nice reminder that what I’m learning in class isn’t all theoretical. There are real people in the world who value these skills and get excited about the things I could potentially build for them, even if the end product is still five weeks out. That’s a nice feeling. 🙂

So until next week friends, here codes nothing!

Feature Photo by Daniel Lee on Unsplash

Week 3 & Week 4: It’s Project Week!

Consider this the BOGO of Here Codes Nothing posts.

I know you’re all very upset that I didn’t put up a Week 3 post last week, but trust me, I have a very good reason…

I just completed my first Project Week!

Ahhhhh yeeeaaaaahhhhh

Yeah, Project Week kicked my ass, but before I dive too deep into it let me just give you a quick recap of Week 3:

Week 3 was all about using complicated branching logic, local storage, and URL search parameters to create a Choose Your Own Adventure-style game. We spent Monday learning different ways to access object properties, then took Tuesday through Friday to mob a full CYOA game — twice.

Here’s what we learned that week:

  • More DOM manipulation and local storage work
  • Accessing deeeeeply nested object properties
  • Lots of logic work, conditional statements, and loops
  • Working on a much larger, multi-day, multi-page project with a group

It was somewhat frustrating trying to figure out how to store and access the info we needed for each quest’s outcome, but I created a diagram (see below) that helped us visualize all the logic branches we were working with and allowed us to work backwards from the object property we were trying to access. It was a hard week for sure, but I had a lot of fun, especially since one full day was essentially writing Bob’s Burgers fanfic. It also really helped prepare us for Project Week.

I’m sending this game to H. Jon Benjamin on spec.

Speaking of…

On to Week 4!

I’ve worked on development teams as a producer before, so the task of ideating, creating, and releasing an app didn’t seem too daunting at first. Of course, managing other people’s work and doing all the work yourself are two completely different beasts, and I learned that fast this past week.

If I’m being 100% honest, I found the concept of Project Week both incredibly valuable and entirely unrealistic. Having been in management positions in the tech field for years now, I know firsthand that there is (almost) never an instance when a small group of developers are asked to play every role in the app creation process, from producer to UX to designer to dev to dev-ops. That being said, I think forcing us to play all those roles on a small project with a tight timeline really underscored how much is involved in producing a client- or public-ready application. It also got everyone involved thinking about time-management, feature prioritization, and the look and feel of the end product.

I feel very lucky about the team I ended up on. My teammates and I were all ambitious and optimistic about what we wanted to build, but were also grounded and realistic when it came to the restrictions we were facing. We dreamt big at the beginning, then prioritized and paired down the actual end product as we were making it. I also found everyone in the group to be excited about our project and eager to learn new things.

I know you’re all champing at the bit to see what we built, so let’s waste no more time and take a look at the final product!


Code in Action

My team built a film noir CYOA-style detective game that incorporated puzzle games and a final “shoot-out” with the villain at the end. Had I been doing Project Week by myself I probably wouldn’t have chosen something so dark in both narrative and visual tone. However! I really loved making this app, and pushing myself out of my aesthetic comfort zone.

Here’s what we built:

Before the Week Ends, An Interactive Whodunnit
GitHub Repo Here | Live Site Here (best viewed on Chrome)

  • What it is: A vanilla JavaScript web-app that is part shooter, part puzzle game, and part choose-your-own adventure, all set in a thrilling film-noir narrative.
  • What it demonstrates: Everything we learned in Boot Camp 1 (and then some): DOM access and manipulation, event listeners, setting and getting objects from local storage, URL search params and all the fancy things you can do with them, TDD, importing/exporting functions, setInterval animations, CSS animations and keyframes, using images, video, and audio, CSS, Flexbox, and CSS Grid.
  • Hardest part: Styling the app for sure, especially in a group setting and especially using styling techniques (Flexbox and Grid) I hadn’t used before.
  • Easiest part: Writing the basic logic for the individual mini-games turned out to be a lot easier than I expected.
My mood by Wednesday evening. Also, according to my instructor, making memes does *not* count as a pomodoro break 😔

Where I Struggled

  • Figuring out the logic for score tracking: Keeping track of where the player had visited and the outcomes of those visits was essential to the story we were trying to tell. Writing the code for each of those different elements wasn’t too hard, but first understanding their interdependencies was tricky.
  • TDD and the *right* way to write tests: My team started writing our first test on Monday, and there was a moment at the beginning when I was getting very upset because I didn’t understand why we were doing it the way we were. Essentially, we’d written out the test (‘if dice roll number is equal to or less than 6 return true’) and then written a function that only contained return true. I didn’t understand why we were basically writing a function that tested “is true true?”, and got frustrated and a bit confrontational with my teammates. When they had us move on to the next test I could see how setting that initial test-pass helped us write out the function logic for passing the next test ad it all finally clicked for me. I understood why that original test was necessary and helpful. Big thanks to my teammates for being patient with me on that!
  • Styling (using Flexbox more and CSS Grid for the first time): Styling is hard, and styling as a group is even harder, and styling as a group when you haven’t really been taught how to do it explicitly is even harder still. We tried to mob the CSS on Wednesday, but that ended up being a nightmare, so we delegated different pages to different people and came together Thursday to compare our work and put it all together.
  • Not bulldozing people: I have strong opinions and often think those opinions are the right opinions, so this week was definitely an exercise in listening to and accepting other people’s viewpoints. When I began to take my ego out of the picture and recognized the project for what it was — a group project — I was able to let go of some of the feelings of responsibility for every aspect of the final project and actually calmed down quite a bit.
  • Eating healthy and exercising: I’m noticing a trend in myself lately: when I’m feeling stressed out or overworked, I use that as an excuse to eat crap and not get any exercise. It’s an upsetting thing to realize, but I’m glad I at least can admit it now and make efforts to change. I don’t expect this course to get any easier, and using stress as an excuse to not take care of myself is a bad habit to get into regardless of my school or work situation.

Where I Succeeded

  • Using my past producer experience to help us manage our time and tasks: I was quickly able to write out the steps we needed to take to get our project done and the timetable we should try to stick to to meet our Friday deadline. We fell off this schedule just a bit at the end of the week, but overall I think I helped considerably in keeping our team on schedule and focused on our top feature priorities.
  • Learning CSS animations and keyframes: Part of the project requirements was to have an “About Us” page, and since our project was inspired by film noir I immediately wanted ours to be a scrolling end credits-style page. This meant having to learn about CSS animations and keyframes. I found it fascinating and relatively easy once I understood the core concept. I am looking forward to using it for other transition effects and fun animations in future projects.
  • Putting together a pretty fun and informative presentation: We finished our final product in time to put together what I thought was a pretty fun presentation. I wrote a script for our group product demo that was part infomercial and part movie pitch, and my teammates pulled it off nicely. We also gave individual tech talks about different parts of the app, and I think they all touched on interesting things and flowed nicely into each other.

Closing Thoughts

I’ve written a lot in this post about my work on the project and the app that my team and I were able to produce, but equally impressive and inspiring were the apps that other groups came up with. From a simple yet addictive tic-tac-toe game, to a Tamagotchi-style friend-creator, to an uber-professional trail-running app, the teams in this class turned it out. I can’t wait to work with them on cool stuff in the future.

I’ll leave you with a picture that pretty much sums up how my dogs felt about Project Week. Joe, the one facing the camera, had tried so hard to stay awake and watch me work, but a post-walk evening nap was just too tempting and he fell asleep with his head on the armrest. 😍😍😍

Shhhhh…. puppers are sleeping.

Until next week, here codes nothing!

Week 2: Using Objects and LocalStorage

Er, wait .. localStorage? local storage? Local Storage?

I’m not such a frazzled wreck this week, folks!

Yes, this week was a much more relaxed pace with more solo work time, fewer pages of reading each night, and a deeper dive into a few core concepts of web development. Here’s what we learned:

  • Creating objects and updating their properties
  • Setting/getting objects in/from LocalStorage
  • Parsing info from LocalStorage and using it to update info on an HTML page
  • More Flexbox! (still kinda hate it tho)
  • More arithmetic/sorting methods, such as Math.min, Math.max, array.sort, etc.
  • Forking and branching
  • Travis.yml – what it does, how it’s helpful, and why it’s a pain in the ass

Code in Action

I didn’t produce as many single projects this week as I did last week, but what I did make was much more complex and more akin to an actual site that you’d see in the real world:

“The Good Company” Job Application Site
GitHub Repo Here

You know you’ve been watching too much The Good Place when you have to create a moralityScoreNode to access your form.
  • What it is: A job application form that gets a user’s input values, generates a personalized response page based on that info, and keeps a list of all applicants via LocalStorage.
  • What it demonstrates: DOM traversal and manipulation, using conditional statements to change user flow, CRUD operation using objects and LocalStorage, dynamically-generating URLs, using URL search parameters, CSS styling for multiple HTML pages.
  • Hardest part: Setting and getting information in LocalStorage, using URL search parameters.
  • Easiest part: Updating DOM elements once the localStorage object was accessible.

Where I Struggled

  • Only made it to the gym once this week: I gave myself last week off since I knew starting school was going to be an adjustment, but I had every intention of making it to the gym before class at least three times this week. Well, that was a bust. I did bike to and from class for four days so I got some exercise, but I’m really going to try hard to start my day off with a workout most days this coming week. It always makes me more alert and energetic in the morning and helps me stay focused throughout the day.
  • JSON syntax: Despite having made some pretty great Harry Potter-themed JSON GIFs (see below), it took me a minute to fully understand what was going on when I was calling JSON. methods on objects.
  • The URL readings: This stuff was waaaay over my head. I didn’t really understand it at all until we walked through it with the TA in class, and even then I needed to put it into practice in my solo project until I fully grasped the concept. I suspect the more we get into backend concepts the more this will be the case for me.
  • Lack of project variety: Adding on to the same job application project day after day was nice in that I got to see an app get more complex and interesting over time, but I did struggle with boredom by day three of the build and started trying to think of new features or new designs to implement to keep myself engaged.
  • CSS burnout: I used to love styling pages, and I did have a good time recreating a nice landing page design, but trying to keep track of CSS files and selectors for specific HTL pages got super tedious. By the end of the week I was not at all interested in styling the new pages I was adding.
And the winner for the least original coding joke goes to….

Where I Succeeded

  • Successfully completed my first few CodeWars challenges! These were really fun and I was surprised at how rewarding it felt to take a simple single-function assignment, brainstorm ways to solve it, work it out in VSCode, then upload to CodeWars and get my solution evaluated. Will definitely be continuing with this track in addition to my class work.
  • Consolidating concepts into a single project: I was able to take the concepts we learned Monday – Wednesday and put them all together into a new job application project on Thursday. There were fewer features and less styling, but I did build it from scratch in a single afternoon with little external help or checking of resources, and for that I’m very proud.
  • Aping other designers’ work! I found a landing page design I liked and was able to recreate it for my job application site, which is pretty lame from a design-originality-point-of-view but was very satisfying from a could-I-implement-a-sexy-page-design-if/when-I-had-to-point-of-view.
  • Helping others: A few of my classmates have started coming to me with challenges they’re facing and we’re working out the solutions together. This feels awesome for a few reasons: 1.) It’s flattering that they think I might have the answer, 2.) It’s a nice way to better get to know people that aren’t in my immediate work group, and 3.) Having to vocalize new concepts to others in a way they can understand really helps me better understand those concepts.
  • Started Typing.io and Flexbox Zombies challenges: I like these programs less than CodeWars, but I see their value and will continue to use them.
  • Got caught up on reading assignments and got some real sleep!
  • Creating this incredibly stupid meme:
Don’t hate me, I was once like you.

Closing Thoughts

It still feels crazy that we’re only two weeks into this class. It feels like I’ve been doing this for a long time. I’m really starting to get to know my TAs and classmates and am still feeling very confident and excited about the skills we’ve already acquired and where we’re headed.

I’ll leave you with what could be the first ever meme and possibly my next tattoo.

Until next week, here codes nothing!

Feature Photo by Steve Johnson on Unsplash

Week 1: Sleep? What’s That?

I can’t believe I’ve been in this course for 18 million years already.

In the words of the incomparable Jon Lovett, what a week.

When our instructors told us during prep-week that it was going to be super intense and we would be diving in head-first right off the bat I thought, “Oh cute, I love hyperbole! How hard could the first week really be, right?”

They were absolutely not joking. I haven’t spent so much time learning, working, struggling, reading, writing, problem-solving, and muttering to myself in years. And comparing where I am now to where I was 10 days ago, it seems unbelievable that I’m producing the work I am now. That’s how far we’ve gone in such short a time.

Let’s go over what we learned just last week:

  • Basic HTML and CSS
  • Accessing and manipulating DOM elements via JavaScript
  • Storing info in variables and changing it later
  • Creating forms and using the form input data
  • Adding and removing tags and classes to the HTML using JS
  • Creating class listeners and performing actions on DOM nodes when those listeners trigger an event
  • Writing functions, writing functions within functions, calling those functions, and importing/exporting functions to/from other files
  • Creating and updating objects, then accessing the properties inside those cute lil objects
  • Looping!
  • Adding logic to apps with conditional statements

As you can see, we’ve covered a lot. Each day comprises about an hour of lecture in the morning, then group code cooking for an hour or two, then a group build, then a solo build, then finishing our solo builds at home if we didn’t finish in class, then about 50–100 pages of reading. Then sleep. Then repeat.

Code In Action

Yes, it’s been intense, but like I mentioned earlier, we’re already producing some pretty cool projects. Here are two of my favorites from the week:H

Hungry Caterpillar
GitHub Repo Here

chompchompchomp, dancedancedance
  • What it is: A web app featuring a caterpillar that you feed by clicking different buttons. Each time you feed her, she grows longer. Buttons below her make different segments of her body move up and down, or ‘dance’.
  • What it demonstrates: DOM traversal and manipulation, control flow, lists, element styling and positioning.
  • Hardest part: Figuring out how to change the position of the body parts when the buttons are clicked.
  • Easiest part: Finding and accessing the DOM elements.

Paint Alyssa Edwards!
GitHub Repo Here

  • What it is: A web app featuring America’s favorite drag queen, Alyssa Edwards! Users can help Alyssa get ready for her big Valentine’s Day date by choosing hair, eye shadow, and lipstick colors.
  • What it demonstrates: DOM traversal and manipulation, dynamically changing CSS styles, absolute positioning, conditional statements.
  • Hardest part: Correctly sizing and placing the image elements to not make her face looked FUBARed..
  • Easiest part: Finding amazing reference pictures of Alyssa Edwards.

Where I Struggled

There were a lot of things I struggled with this week, such as:

  • Getting less sleep each night
  • Intensely using my brain 12+ hours a day: Our instructor repeatedly refers to our brain as a muscle and us as mental athletes, and it’s very obvious that I haven’t exercised it like this in years
  • Working in groups: I struggle with patience and usually want to move ahead even if people in my group don’t fully understand the concept yet, so it’s taken some effort to slow down and be in the moment with the rest of my teammates.
  • Keeping up with the readings: Trying to absorb new coding concepts at the end of a long day of coding is haaaaard. The reading load apparently gets lighter as the course progresses, which is nice, but for now it’s a tedious way to end the day.
  • Flexbox: This is an approach to CSS I’ve never seen before and it’s been surprisingly tricky to wrap my brain around.
  • The Nightmares! I’ve had coding dreams almost every night since the course started and they are mostly weird, anxiety-ridden nightmares. Some of them are funny in retrospect (my sister yelling at me to cut the pickles both thin and lengthwise was particularly amusing), but most of them are just unpleasant and stressful.

Where I Succeeded

It hasn’t all been challenges this week. I’ve also done pretty damn well over the past few days:

  • I’ve fully completed and, most importantly, understood each project and it’s core concepts.
  • As the projects got more complex the styling became more fun. The Alyssa Edwards and hungry caterpillar projects are good examples of what spending a little extra time to style something can mean to the quality of the end result.
  • My general knowledge retention has surprised me. I honestly can’t believe we’re only one week in. I feel like i know a thousand times more than I did when i started, and I’m proud of myself for being able to keep up and not give up on challenging concepts.
  • I’ve been tweeting regularly, which seems like a silly thing to brag about but it actually helps me keep track of my insights, feelings, and others observations in the moment when I would otherwise lose them.
  • I surpassed 50 Twitter followers!
  • I went to my first Out In Tech event and have a coffee meeting scheduled with an Out In Tech PDX leader for next week.
  • Finally, I got two compliments on my blog. 🙂

Closing Thoughts

It’s been a tough week, yes, but I’m so excited to be on this path and couldn’t have asked for better instructors or classmates. Everyone is whip smart and fun to be around, which makes me even more motivated to get up and go to class every day. I already feel incredibly accomplished and it’s only been one week, which makes me really confident about where we’re headed and the skills I’ll gain over the next five months.

I’ll leave you with another picture of my dog Joe, who recently got a new stuffed bear and refuses to part with it, even when going outside in the snow to pee.

Until next week, here codes nothing!

Feature Photo by Cris Saur on Unsplash

Pre-Week: Boot-Camp Prep

A crash course in programming fundamentals.

This past week was all about getting familiar with dev fundamentals: keyboard shortcuts, the terminal, git/github, VSCode, HTML, CSS, and JavaScript. It was fast-paced and not very thorough, but as our instructor Marty explained, the week was about getting us comfortable with using common developer tools and introducing us to concepts we’ll be diving into later in the course.  

Code in Action

Not a ton of amazing code came out of this week, tbh. My repos can be found here (bootcamp-prep-day-1 – 4). We mostly just messed around with page structure, styling, and some basic JavaScript functions. Below is a screenshot of my beautifully-designed page from Day 2 (HTML + CSS).

Look on my Works, ye Mighty, and despair!

I am particularly proud of my Lennon Parham reference on that page, and plan on creating a Womp It Up! lorem ipsum generator sometime soon. #turnaround

We did make a fun MadLibs-style web app on Day 4, our final day of coding for the week. That was an interesting day. We began getting into JavaScript on Wednesday, and I had a harder time with those intro projects than the more advanced MadLibs project we were asked to make at the end of class on Thursday. I guess it makes sense — on Wednesday I was re-acquainting myself with JavaScript concepts I had previously learned and trying out new ones, but by Thursday I was more comfortable and able to knock out a pretty fun MadLibs story.

Where I Struggled

Honestly, the hardest part of this week was my schedule. I got up at 6 AM to go to the gym, then go work a full day, grab some quick dinner, and be in class from 6 PM  – 9 PM. Maybe I’m just getting older, but by Wednesday that schedule had really caught up to me and I was ready to get into the full time 9 AM – 6 PM course.

I also struggled a bit with meeting new people. I’m pretty outgoing by nature, but often need an intermediary to make connections for me before I’m comfortable diving into a conversation with a stranger. Luckily my friend Megan is also taking the course, but I did have to step outside my comfort zone a few times to engage in conversation with the other students I didn’t know.

Thank god for you, @megswuzhere

Where I Succeeded

I was familiar with HTML/CSS/JavaScript before this and did all the assigned pre-work before the week started, so I’m confident in my understanding of the basics and the work I produced. I definitely feel ready for boot-camp classes to begin.

I think my biggest success for the week was the MadLibs project. I completed the project and pushed to GitHub before the end of class, we reviewed my app as a group, and I just so happened to get a round of applause from the class. I gotta say, that felt really great. I’ve worked very hard to get to where I am now, and I plan on working even harder throughout this course. Keep the applause comin’, folks 🙂

This week also encouraged me to dig through some of my old repos on Github, which was good for a chuckle. One project I’d forgotten about was Make It Rain for Kitty, a super-simple JavaScript web app using p5.js I built a few years ago. A user can click their mouse anywhere on the page and raindrops will fall, captivating the cat sitting and staring out the window. It’s pretty cute if you ask me, and something I plan on revisiting when I’m a little more skilled in JavaScript and Processing.

I could watch this cat watch that rain all day.

Closing Thoughts

All in all I thought this week went well! I’m excited to get started full-time at the end of the month, even if it means lugging my heavy books back and forth to class on my bike in the rain. That’s the life, I guess!

Thanks for stopping by, and until next week, here codes nothing!

🙂
 Feature photo by moren hsu on Unsplash